
TL;DR: Designing a custom motorcycle club patch starts with knowing what type of rider or group you are. If you’re a formal MC, your layout follows a specific structure — center patch, top rocker, bottom rocker. If you’re a riding club or independent rider, you have more flexibility but still need to be smart about layout, size, materials, and what certain symbols communicate. This guide walks you through the full design process, from concept to what to send a patch maker.
We get a lot of requests that go something like this: “I want to start a riding club. How do we get patches made?” The question sounds simple. The answer has a few layers.
Getting the layout wrong, the sizing off, or the materials wrong can mean re-ordering everything. Getting the symbolism wrong can mean more than that. This guide is here so neither thing happens.
What kind of group are you designing for? (Start here)
Before you touch a design tool or contact a patch maker, answer this:
- Are you a formally recognized Motorcycle Club (MC)?
- Are you a Riding Club (RC) — a more casual group without formal MC structure?
- Are you an independent rider designing for personal expression or an event?
This matters because the layout conventions for each group are completely different. An MC typically uses a three-piece set — top rocker, center patch, bottom rocker — what the culture calls “colors.” A riding club or independent rider can still have great patches but should avoid layouts that look like official MC colors.
The American Motorcyclist Association — whose official history traces back to 1924 and over 1,100 chartered clubs across the US — draws a clear line between formally sanctioned clubs with bylaws and governance structures versus informal riding groups. That distinction directly affects what patch layout is appropriate for your group.
If you’re unsure what layouts are off-limits and why, read our guide on motorcycle patches to avoid before you finalize anything. It covers the 3 patch rule, territory rockers, and why certain designs cause problems even when the artwork is totally original.
The anatomy of a motorcycle club patch set
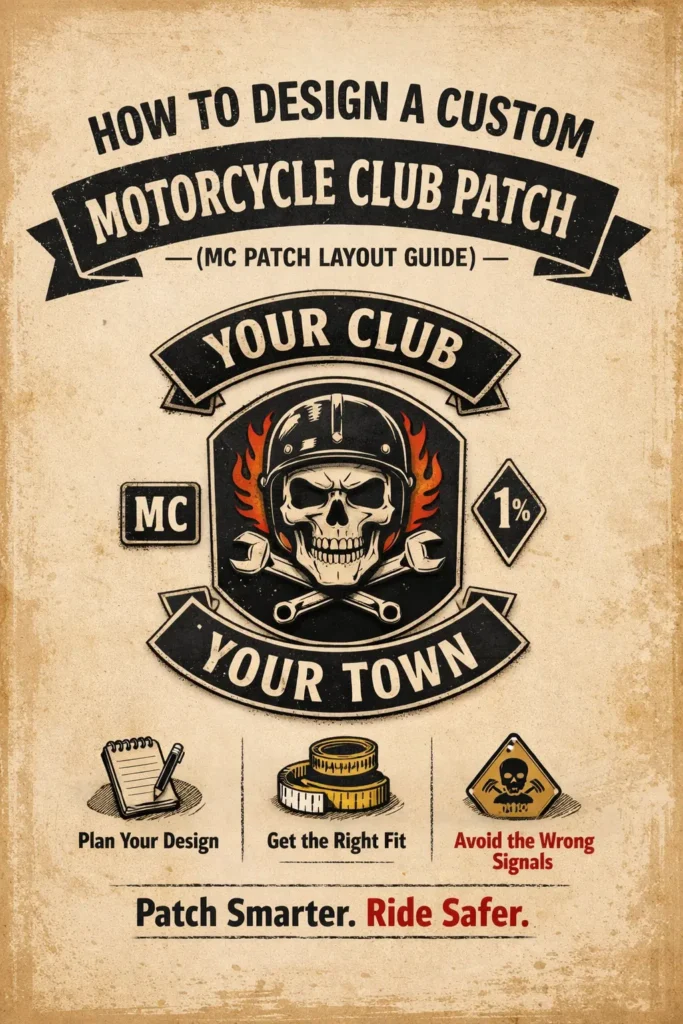
A full MC back patch set typically has three pieces:
Top Rocker — Curved patch that sits above the center. Usually carries the club name.
Center Patch — The largest piece. This is your main logo or emblem — a skull, eagle, animal, symbol, or custom artwork that represents the club’s identity.
Bottom Rocker — Curved patch that sits below the center. Usually carries the territory (state, city, or chapter name).
Beyond the back, members often wear smaller front patches that show rank or role. Common ones include President, Vice President, Secretary, Treasurer, Road Captain, and Sergeant at Arms.
The full set together is what people refer to when they say “colors.” That’s why layout and proportion matter so much — it’s not just one patch, it’s a system.
The three-piece format has a specific origin. According to the Wikipedia entry on outlaw motorcycle clubs, clubs operating outside AMA sanction adopted the three-piece back layout to distinguish themselves — top rocker for club name, center for emblem, bottom rocker for territory. That history is why the structure carries real weight in the biker community today, even when the artwork is completely original.
Step 1: Design your center patch first
The center patch drives everything else. Once you know its width and shape, your rockers can be sized to match.
A few things to nail down at this stage:
Shape: Most center patches are round or shield-shaped. Die-cut shapes (custom outlines) work too, but round is the most traditional and easiest to balance with curved rockers.
Artwork: Skulls, eagles, wolves, flames, and crossed tools are all classic biker themes. Whatever you choose, it needs to read clearly from a distance on denim or leather. High contrast between the background and the main image is non-negotiable.
Size: For most adult motorcycle vests, a center patch sits between 10″ to 12″ tall. If it’s too small, the overall set looks like it’s floating on the back. If it’s too wide, it runs into the side seams.
Colors: Stick to bold, saturated colors with dark outlines. Pale or pastel designs lose impact fast on dark vest material. Three to five colors is usually the sweet spot — more than that and the digitization cost goes up and fine details can muddy in embroidery.
Step 2: Size your rockers to match
Once the center patch width is set, your rockers should match or sit within half an inch wider.
- Center patch 10″ wide → top and bottom rockers at 10″ to 10.5″
- Center patch 11″ wide → rockers at 11″ to 11.5″
- Center patch 12″ wide → rockers at 12″ to 12.5″ (only if the vest panel allows it)
For a full sizing breakdown including how to measure seam-to-seam and what height works for readable lettering, check our Motorcycle Vest Rocker Patch Size Guide. It covers standard vests, tight panels, wider cuts, and border spacing so the whole set sits clean.
One thing people consistently get wrong: ordering the center patch and rockers separately without coordinating the widths. The back set ends up looking mismatched because one piece is slightly wider than the other. If you’re ordering a full set, plan all three pieces together.
Step 3: Choose your patch type (embroidered vs PVC)
This choice affects how the finished patch looks, feels, and holds up on the road.
Embroidered patches are the classic choice for motorcycle vests. Thread-based, textured, and they carry the traditional biker aesthetic well. They sew on cleanly and last for years when maintained right. Best for most club patches.
PVC patches are molded rubber. They hold fine detail better than embroidery, they’re fully waterproof, and they don’t fray. They’ve become popular for morale-style patches and smaller front pieces. Less traditional for full back sets, but not unheard of — especially for modern riding clubs who want a different look.
Woven patches are flatter than embroidered and capture smaller text and intricate detail cleanly. Good for name patches, rank patches, or anything with a lot of fine type.
For a traditional MC or riding club vest, embroidered back set with woven or embroidered front patches is the most common combination.
Step 4: Pick the right backing
For any patch going on a motorcycle vest, sew-on backing is the right call.
Leather and denim flex constantly on a ride. Heat-applied adhesive (iron-on) can and does loosen over time under those conditions. A sew-on patch, properly stitched down, will outlast the vest itself.
Velcro backing is used by some riders who swap patches between jackets or have a vest and a jacket they alternate. It works, but the loop side (on the vest) needs to be stitched in cleanly or it peels at the edges.
Iron-on only makes sense for event patches or patches on garments that don’t see hard riding conditions.
Step 5: Front patches — rank, role, and personal
The back set is the identity. The front patches are the detail.
Typical front patch placement on a vest:
- Left chest: Club name patch or small logo
- Right chest: Rank or role patch (President, Road Captain, etc.)
- Left lapel: Member number or chapter patch
- Right lapel: Years of membership, milestone patch, or event patch
Front patches are usually smaller — 3″ to 4″ wide at most. They need to be readable at a glance, so clean fonts and bold contrast matter even more at small sizes.
If you’re designing for a riding club without formal rank structure, front patches are a good place for member nicknames, city pride, or bike brand patches.
What the patch layout signals to other riders
This part matters more than most people expect.
Harley-Davidson’s own H.O.G. Chapter Handbook — the official guide for the world’s largest company-sponsored riding group — explicitly warns members against adding a bottom rocker to their vest precisely because the three-piece layout is so strongly associated with formal MC identity. If Harley-Davidson itself tells its own members to avoid that format, that tells you how seriously the biker community reads patch structure.
A single-piece patch signals independent or casual riding. A two-piece can indicate a club in formation. A three-piece is universally read as full MC membership. The structure of your patch — not just the artwork — is what experienced riders notice first.
A few design mistakes that come up constantly
Too much text on the center patch. The center is for the emblem, not a full sentence. Club mottos belong on a small front patch or the border of the center, not crammed into the main design.
Fonts that look fine on screen but fall apart in embroidery. Thin serif fonts and script fonts lose their edges at small sizes. Block fonts and bold sans-serifs hold up. If you’re unsure, ask to see the font at your patch’s actual size before approving production.
Ordering rockers without coordinating with the center patch. Plan the set as a set — not three separate orders.
Copying the layout of a real club. Even with different text and different artwork, a layout that mirrors a known club’s color structure can cause problems in the real world. Design original, not inspired-by.
What to send a patch maker when you’re ready to order
A lot of orders get delayed or come back wrong because the brief was vague. Here’s exactly what to send:
- Your artwork file — AI, EPS, or high-resolution PNG (at least 300 DPI). If you don’t have a file, describe the design and a good patch maker can build a mockup.
- Patch type — embroidered, PVC, or woven
- Size for each piece — width and height, or your seam-to-seam vest measurement
- Thread colors — reference a shade card if possible, or be specific (navy, not “dark blue”)
- Backing type — sew-on, iron-on, or Velcro
- Quantity — how many full sets, and whether all pieces are the same count
- Deadline — if you have a rally, event, or club meeting date, name it upfront
The more specific your brief, the faster the mockup and the fewer revision rounds before production.
Ready to order your custom motorcycle club patches?
If you have artwork ready, send it over with your sizes and quantity. If you’re still in the concept stage, describe what you have in mind and we’ll build a mockup at no charge — you don’t pay anything until you approve the design.
At Teddy Patches, we make:
- Full back patch sets (center patch + top and bottom rockers)
- Front rank and role patches
- Embroidered, PVC, and woven options
- Minimum order of 10 pieces with bulk pricing from there
We send a digital proof before anything goes into production, and revisions are included. If the size looks off on your vest, we’ll adjust before the needle hits the twill.
Send your design, measurements, and quantity to get a quote. If you want the whole set done right the first time, that’s what we’re here for.